High-protein energy bars are no-bake snacks made with oats, protein powder, and a binding ingredient like nut butter or honey. These homemade protein bars are quick to prepare, easy to customize, and perfect for meal prep or healthy snacking.
Let’s be honest. Most homemade versions end up dry, crumbly, or just not worth making again. You take one bite and regret not buying a packaged bar instead.
This recipe fixes that. You’ll get soft, chewy high-protein energy bars that hold together, taste great, and actually keep you full. Once you get the texture right, these become a weekly staple.
Why You’ll Love These High-Protein Energy Bars
- No bake protein bars – You can make a batch in under 20 minutes, no oven needed
- Balanced macronutrients – Protein, fiber, and healthy fats all in one
- Soft and chewy texture – No dry, crumbly bites here
- Easy to customize – Switch flavors based on what you have
- Perfect for meal prep – Make once, snack all week
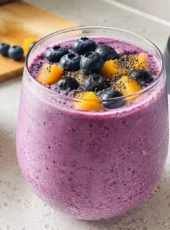
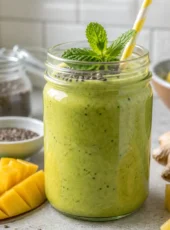
- Pairs perfectly with healthy drinks – Try them with this anti-inflammatory green smoothie for a balanced snack
Ingredients and Substitutions

Let’s break this down so you don’t just follow a recipe, you actually understand why it works. That’s the difference between bars that hold together and ones that crumble in your hands.
Core Ingredients Explained (What Each One Does)
- Rolled oats
These are your base. They add structure, fiber, and a slightly chewy texture. Quick oats work too, but the bars will be softer. - Protein powder
The main protein boost. A good-quality powder makes a big difference. According to Harvard’s guide on protein intake and sources, protein helps with satiety and muscle repair, which is exactly why these bars work so well as a snack. - Nut butter (peanut, almond, etc.)
This is your binding hero. It holds everything together while adding healthy fats and richness. If your bars ever fall apart, this is usually the ingredient to adjust. - Liquid sweetener (honey or maple syrup)
Adds sweetness and helps glue the mixture. It also keeps the bars soft instead of dry. - Milk (or plant-based milk)
Helps loosen the mixture so it’s easier to press and shape. Just enough makes a big difference. - Add-ins (chocolate chips, seeds, nuts)
Flavor, crunch, and extra nutrients. Totally flexible.
Smart Substitutions for Homemade Protein Bars
Need to tweak things? No problem.
- Vegan option
Swap honey for maple syrup and use plant-based protein powder + milk. - Nut-free version
Use sunflower seed butter or tahini instead of peanut/almond butter. - Lower sugar option
Reduce the sweetener slightly and add mashed dates for natural sweetness. - Gluten-free
Use certified gluten-free oats. - Higher protein boost
Add a bit more protein powder, but balance it with extra liquid or nut butter so the bars don’t dry out.
💡 Quick tip: If your mixture feels too dry while mixing, add 1–2 teaspoons of milk at a time. Too sticky? Sprinkle in a bit more oats. You’re aiming for a thick, slightly sticky dough that presses easily.
How to Make High-Protein Energy Bars (No-Bake Protein Bars Method)

This is where everything comes together. The key here isn’t just mixing ingredients, it’s getting the texture right at every step.
1. Prepare your pan
Line an 8×8-inch pan with parchment paper, leaving some overhang on the sides.
This makes it easy to lift the bars out later without breaking them.
2. Mix the dry ingredients
In a large bowl, combine:
- Rolled oats
- Protein powder
Stir well so the protein powder is evenly distributed. This prevents dry pockets later.
3. Warm the wet ingredients
In a small saucepan (or microwave-safe bowl), gently warm:
- Nut butter
- Honey or maple syrup
Heat just until smooth and easy to stir. Don’t overheat, you just want it pourable.
4. Combine everything
Pour the warm mixture into the dry ingredients. Add a splash of milk.
Mix thoroughly until you get a thick, sticky dough.
If it feels too dry, add milk 1 teaspoon at a time. If too wet, add a bit more oats.
👉 You’re aiming for a texture that holds together when pressed, not crumbly, not runny.
5. Fold in add-ins
Stir in chocolate chips, nuts, or seeds.
Tip: Let the mixture cool slightly before adding chocolate chips so they don’t melt completely.
6. Press into the pan (very important)
Transfer the mixture to your lined pan.
Now press it down firmly and evenly using:
- The back of a spoon, or
- Your hands (slightly damp to prevent sticking)
👉 This step is critical. Press harder than you think. Loose packing = crumbly bars later.
7. Chill until firm
Refrigerate for at least 1–2 hours, or until fully set.
If you’re in a hurry, 30–40 minutes in the freezer works too.
8. Slice into bars
Lift the mixture out using the parchment paper and cut into bars or squares.
Use a sharp knife and wipe it clean between cuts for neat edges.
💡 Real-life tip: If your bars feel slightly soft after cutting, pop them back in the fridge. They firm up nicely without losing that chewy texture.
Why Your Protein Bars Fall Apart (And How to Fix It)
If you’ve ever made protein bars that crumble the second you pick them up, you’re not alone. It usually comes down to a few small mistakes that are easy to fix once you know what to look for.
1. Not Enough Binding Ingredients
This is the most common issue.
What’s happening:
Your mix doesn’t have enough “glue” to hold everything together.
How to fix it:
- Add more nut butter or honey
- Mix again until everything sticks when pressed
👉 Think of it like this: if it doesn’t hold together in the bowl, it won’t magically fix itself in the fridge.
2. Too Much Protein Powder
Protein powder is great, but it can dry things out fast.
What’s happening:
The mixture becomes powdery and stiff instead of soft and sticky.
How to fix it:
- Reduce protein powder slightly
- Add a splash of milk or extra nut butter
💡 Some protein powders absorb more liquid than others, especially plant-based ones.
3. Not Pressing the Mixture Firmly Enough
This step gets rushed way too often.
What’s happening:
Air pockets stay in the mixture, so the bars don’t hold their shape.
How to fix it:
- Press the mixture down firmly and evenly
- Use a flat surface (like a glass or a spoon) to compact it
👉 If your arms aren’t doing a little work here, you’re probably not pressing enough.
4. Skipping Chill Time
Yes, it’s tempting to cut them early. It never ends well.
What’s happening:
The bars haven’t had time to set, so they fall apart.
How to fix it:
- Chill for at least 1–2 hours
- Or use the freezer if you’re short on time
5. Wrong Ingredient Balance
Getting the ratio right is everything.
Quick fix rule:
- Too dry → add liquid (milk, honey)
- Too sticky → add dry (oats, protein powder)
💡 Simple test: Grab a small piece and press it in your hand. If it holds its shape without cracking, you’re good to go.
Expert Tips for Perfect Chewy Protein Bars
This is where your bars go from “pretty good” to the kind you actually look forward to eating. Small tweaks here make a huge difference.
1. Get the Right Balance (This Changes Everything)
Think in ratios, not just ingredients.
- Too dry? Add more nut butter or a drizzle of honey
- Too sticky? Add oats or a bit more protein powder
👉 You’re aiming for a dough that’s thick, slightly sticky, and easy to press, not crumbly or wet.
2. Choose the Right Protein Powder
Not all protein powders behave the same.
- Whey protein → smoother, softer texture
- Plant-based protein → thicker, more absorbent
If you’re using plant-based, you’ll usually need extra liquid to balance it out.
3. Don’t Skip the Mixing Stage
A quick stir won’t cut it.
- Mix until everything is fully coated
- Scrape the sides and bottom of the bowl
👉 Uneven mixing = dry pockets = bars that break apart later
4. Press Like You Mean It
This is the step most people underestimate.
- Use firm pressure
- Aim for an even, compact layer
💡 A flat-bottom glass works great here. Press down and smooth the surface.
5. Control the Chill Time
- Short chill (1 hour): softer, slightly fudgy bars
- Long chill (2+ hours): firmer, cleaner slices
Want that perfect chewy bite? Go somewhere in the middle.
6. Let Them Sit Before Eating
This sounds small, but it matters.
After cutting, let the bars sit at room temp for a few minutes.
The texture softens slightly, and the flavors come through better.
7. Add Texture on Purpose
Great bars aren’t just soft, they have contrast.
Try adding:
- Chopped nuts for crunch
- Seeds for a slight bite
- Chocolate chips for richness
👉 That mix of textures is what makes them feel like a real snack, not just “healthy food.”
💡 Personal tip: I always make a double batch and store half in the freezer. In the future, you will be very happy about that.
Meal Prep Energy Bars: Storage, Serving, and Tips

Once your bars are ready, the next step is keeping them fresh and actually enjoying them at the right time. A few small habits here make a big difference.
How to Serve Them
These bars are super flexible.
- Grab one as a quick breakfast on busy mornings
- Eat one before a workout for steady energy
- Use it as a mid-afternoon snack to avoid energy crashes
If you want to level it up, pair them with something like a smoothie. For example, this anti-inflammatory smoothie for balanced nutrition makes a great combo.
How to Store Homemade Protein Bars
- In the fridge: up to 7 days in an airtight container
- At room temperature: 1–2 days (if your kitchen isn’t too warm)
Keeping them chilled helps maintain that firm, chewy texture.
Can You Freeze Them? (Yes, and You Should)
Freezing is honestly the best move if you’re making a big batch.
- Wrap bars individually or store in a sealed container
- Freeze for up to 2–3 months
- Let it sit at room temp for 10–15 minutes before eating
👉 They don’t lose texture, which is a huge win.
Meal Prep Strategy (Make Life Easier)
If you like planning ahead, this is where these bars really shine.
- Make a batch at the start of the week
- Store half in the fridge, half in the freezer
- Rotate as needed
Pair them with other easy options like this simple oatmeal breakfast bowl idea, or keep them alongside your weekly snacks using these healthy snack ideas for busy days.
Pro Storage Tip
Place a piece of parchment paper between layers if stacking bars.
This keeps them from sticking together and makes grab-and-go easier.
💡 Quick reality check: If your bars start drying out in the fridge, it usually means they needed a bit more moisture during mixing. Easy fix for next batch.
Easy Homemade Protein Bars Variations to Try
Once you’ve nailed the base recipe, this is where things get fun. You can switch flavors depending on your mood, your pantry, or honestly… whatever you’re craving that day.
1. Chocolate Peanut Butter Bars
This is the classic combo that never disappoints.
- Add cocoa powder to the mix
- Use peanut butter as your base
- Toss in dark chocolate chips
👉 Rich, slightly sweet, and feels like a treat more than a “healthy snack”
2. High-Fiber Energy Bars
Great if you want something more filling.
- Add chia seeds or flaxseeds
- Mix in a bit of oat bran
- Use less sweetener if you prefer a more neutral taste
If you like fiber-rich snacks, something like this chia seed pudding for digestive support pairs really well with these bars.
3. Keto-Friendly Version
Lower the carbs without losing texture.
- Replace oats with almond flour or coconut flour
- Use a low-carb sweetener
- Stick with high-fat nut butters
👉 These will be softer and slightly denser
4. Crunchy Texture Bars
If you don’t like soft-only bars, add some bite.
- Chopped almonds, walnuts, or peanuts
- Pumpkin or sunflower seeds
- A few crispy rice puffs
👉 That contrast makes a big difference, it keeps every bite interesting
5. Fruity Energy Bars
For a naturally sweet twist.
- Add chopped dates, raisins, or dried cranberries
- Reduce the added sweetener slightly
- Pair with vanilla protein powder
💡 Dates also help with binding, so your bars will hold together even better.
6. Meal Prep Power Bars
If your goal is performance and convenience:
- Add extra protein powder
- Mix in nut and seed combos
- Cut into slightly larger portions
Pair these with your weekly routine using simple strategies like these meal prep tips for saving time.
💡 Simple idea: Make one base batch, split it into two bowls, and create two different flavors at once. Same effort, double the variety.
7. No-Bake Trail Mix Energy Bites
If you want something quicker and more snackable, try these no-bake trail mix energy bites. They use a similar base but are rolled into bite-sized portions, making them perfect for grab-and-go snacking.
Conclusion
Making your own high-protein energy bars is one of those small habits that pays off fast. You save money, control the ingredients, and get a snack that actually keeps you full.
Once you get the texture right, everything else becomes easy. You can tweak flavors, adjust sweetness, or boost protein depending on your goals. No more guessing, no more crumbly disasters.
Give these a try, play around with the variations, and find your go-to combo. Chances are, you’ll start keeping a batch in your fridge every week.
FAQ
How do you make high-protein energy bars stick together?
You need enough binding ingredients like nut butter and honey. Pressing the mixture firmly into the pan and chilling it properly also helps everything hold its shape.
Are homemade protein bars healthy?
Yes, because you control the ingredients. You can limit added sugars and choose high-quality protein sources.
What protein powder works best for bars?
Whey protein creates a smoother texture, while plant-based protein absorbs more liquid and may need extra moisture. It depends on your preference and dietary needs.
Can you freeze protein energy bars?
Yes. Wrap them well and freeze for up to 2–3 months. Let them sit at room temperature for a few minutes before eating.
Why are my protein bars dry?
Usually because of too much protein powder or not enough liquid ingredients. Adding a bit more milk, honey, or nut butter can fix this quickly.
How long do homemade protein bars last?
They last about 7 days in the fridge when stored in an airtight container. For longer storage, freezing works best.
Have more questions? Ask in the comments!

High-Protein Energy Bars (Soft, Chewy & Meal-Prep Friendly)
Soft, chewy high-protein energy bars made with simple no-bake ingredients. Perfect for meal prep, quick snacks, and steady energy on the go.
12
servings15
minutes1
hour1
hour15
minutesIngredients
1 1/2 1 1/2 cups rolled oats
1/2 1/2 cup protein powder
1/2 1/2 cup nut butter
1/3 1/3 cup honey or maple syrup
2 2 tablespoons milk
1/4 1/4 cup chocolate chips or other mix-ins
Pinch of salt
Directions
- Line an 8×8-inch pan with parchment paper, leaving extra paper on the sides for easy lifting.
- In a large bowl, stir together the rolled oats and protein powder.
- In a small bowl or saucepan, gently warm the nut butter and honey or maple syrup until smooth.
- Pour the wet mixture into the dry ingredients. Add the milk and mix until a thick, sticky dough forms.
- Fold in the chocolate chips or other mix-ins.
- Transfer the mixture to the lined pan and press it down firmly into an even layer.
- Chill in the refrigerator for 1 to 2 hours, until firm.
- Lift out of the pan and slice into 12 bars.
Notes
- If the mixture feels too dry, add milk 1 teaspoon at a time.
- If it feels too sticky, mix in a little more oats.
- For firmer bars, chill longer before slicing.
- Store in an airtight container in the fridge for up to 7 days
Nutrition Facts
- Calories: 210kcal
- Fat: 9g
- Carbohydrates: 22g
- Fiber: 3g
- Sugar: 9g
- Protein: 10g